Looker
Looker can connect to ClickHouse Cloud or on-premise deployment via the official ClickHouse data source.
1. Gather your connection details
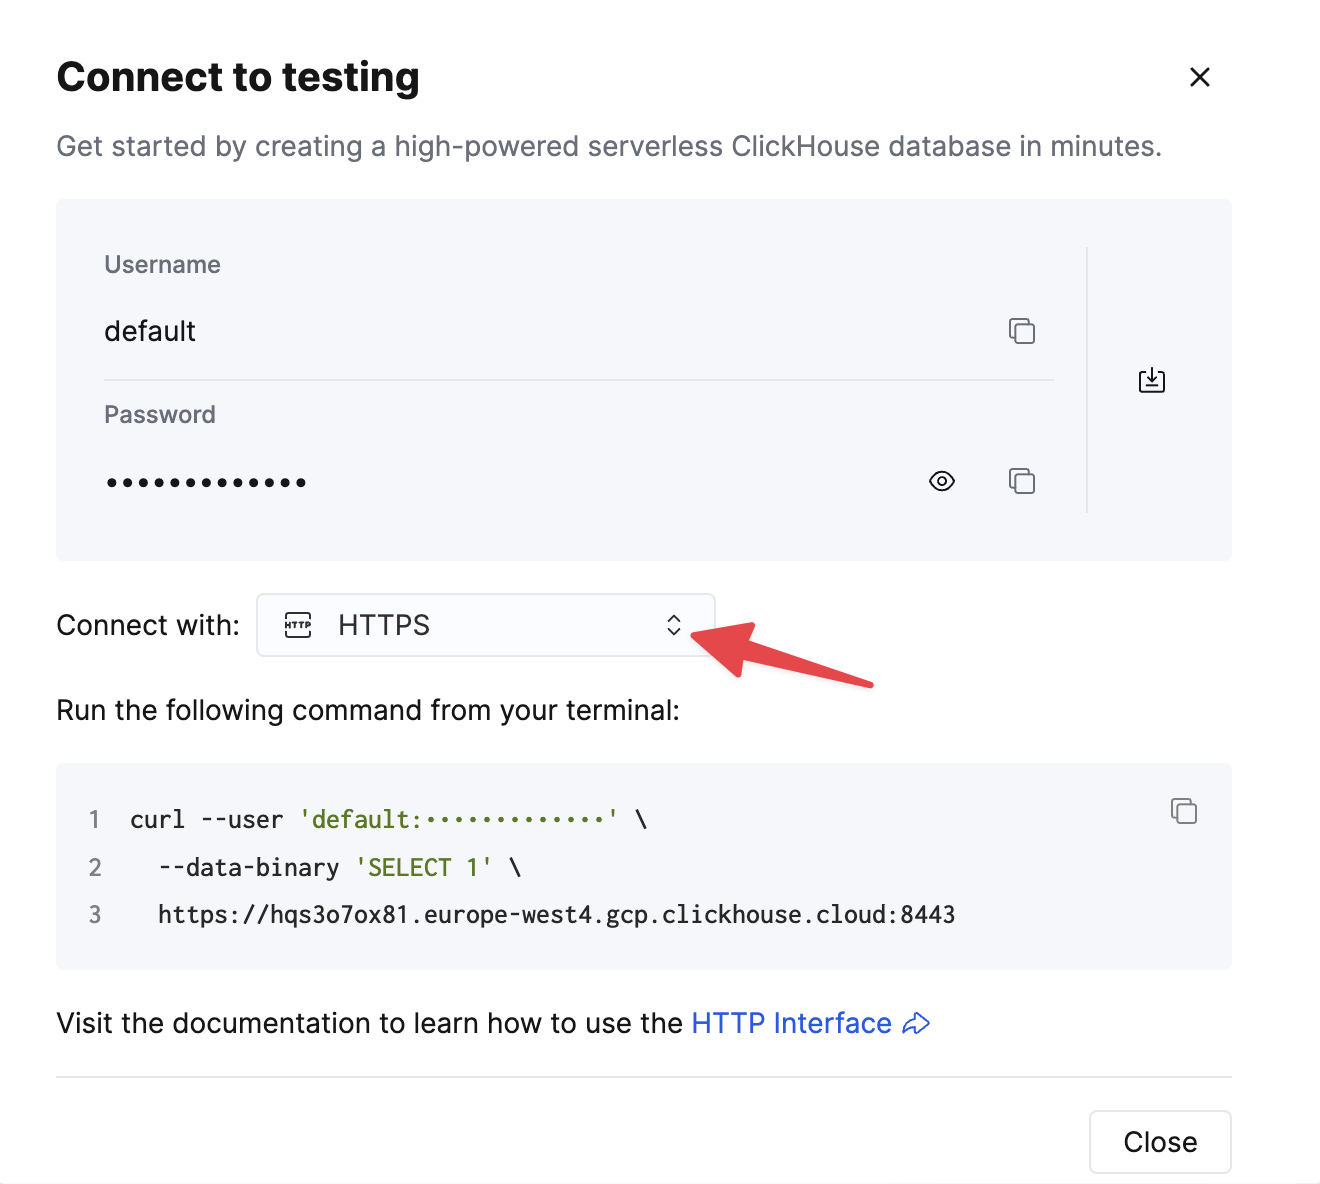
To connect to ClickHouse with HTTP(S) you need this information:
-
The HOST and PORT: typically, the port is 8443 when using TLS or 8123 when not using TLS.
-
The DATABASE NAME: out of the box, there is a database named
default, use the name of the database that you want to connect to. -
The USERNAME and PASSWORD: out of the box, the username is
default. Use the username appropriate for your use case.
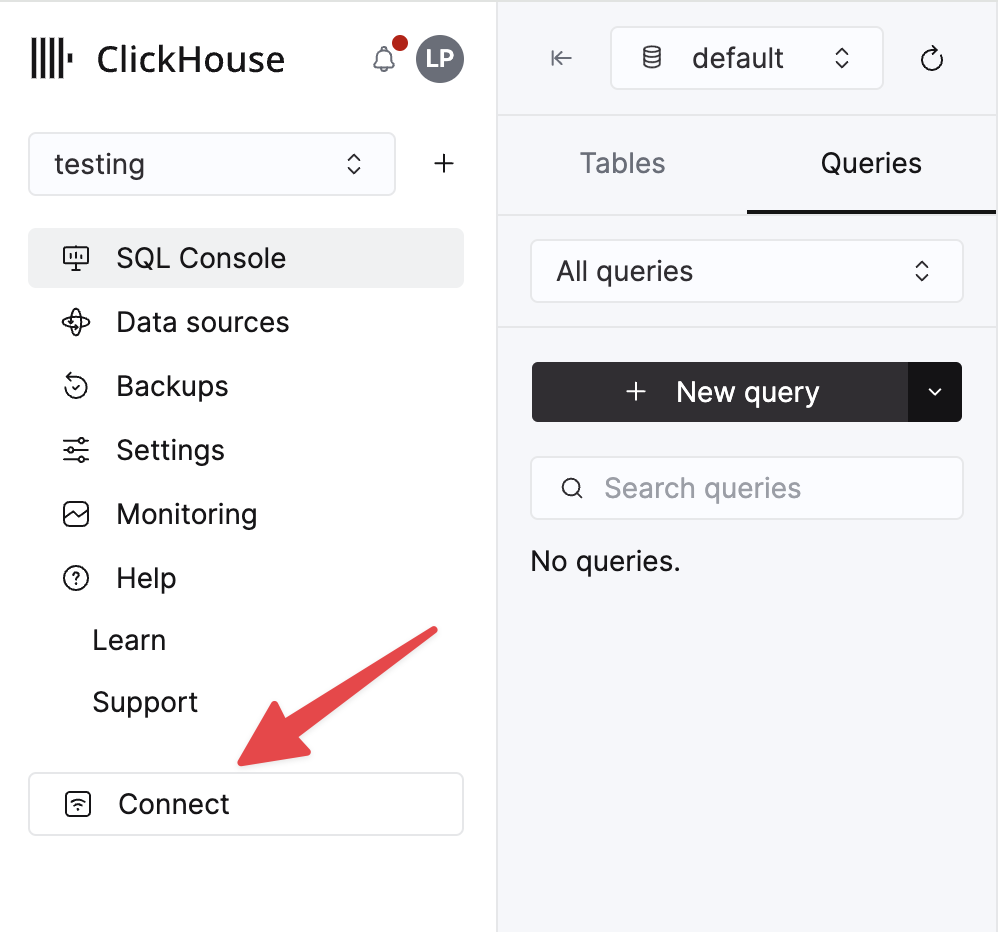
The details for your ClickHouse Cloud service are available in the ClickHouse Cloud console. Select the service that you will connect to and click Connect:
Choose HTTPS, and the details are available in an example curl command.
If you are using self-managed ClickHouse, the connection details are set by your ClickHouse administrator.
2. Create a ClickHouse data source
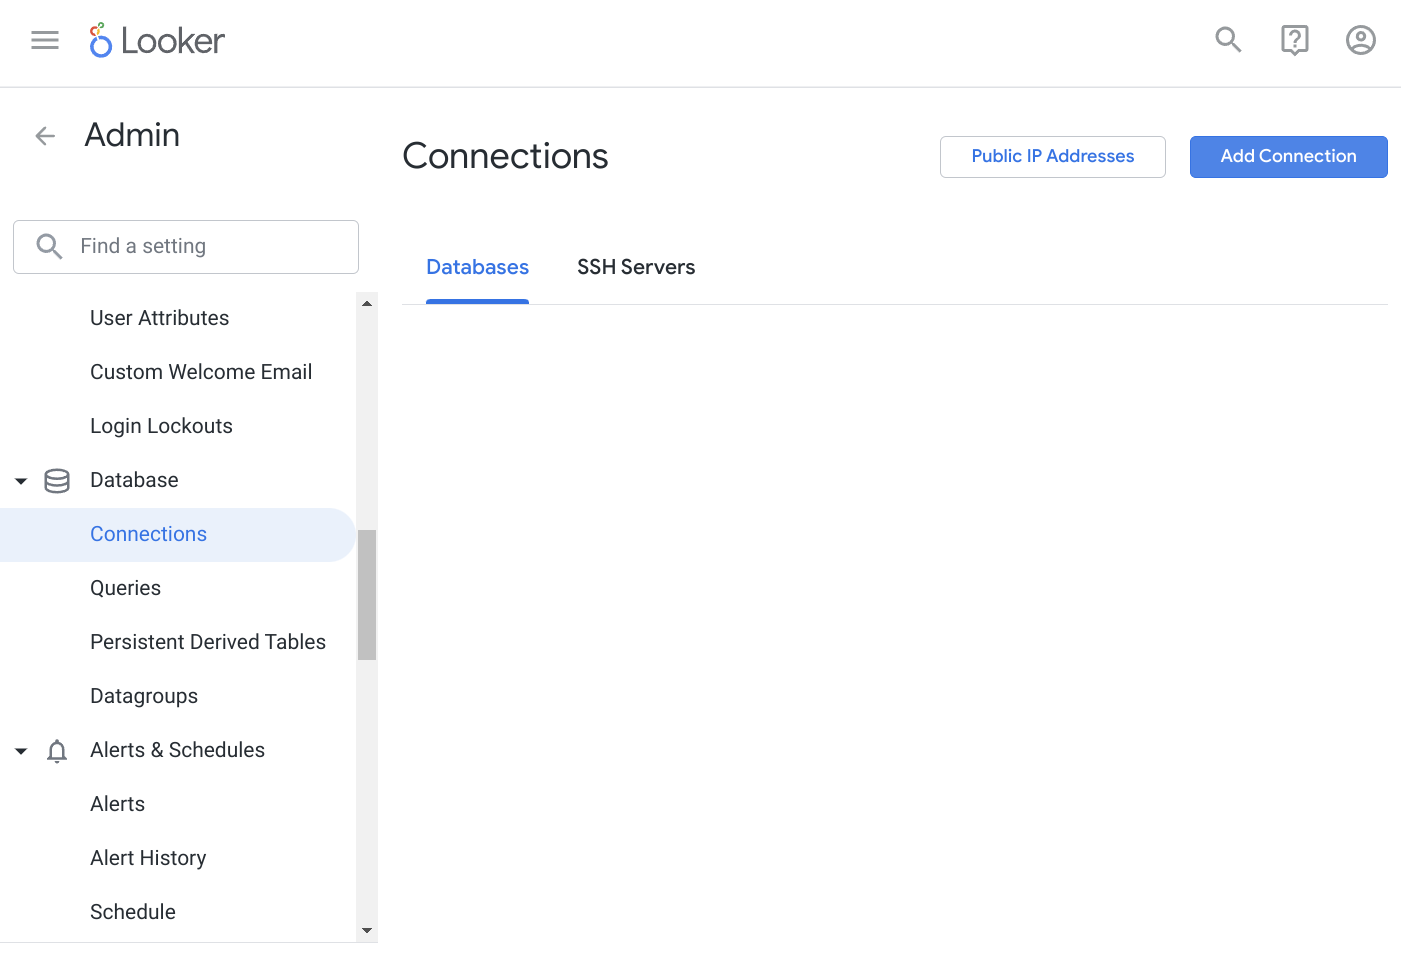
Navigate to Admin -> Database -> Connections and click the "Add Connection" button in the top right corner.
Choose a name for your data source, and select ClickHouse from the dialect drop-down. Enter your credentials in the form.
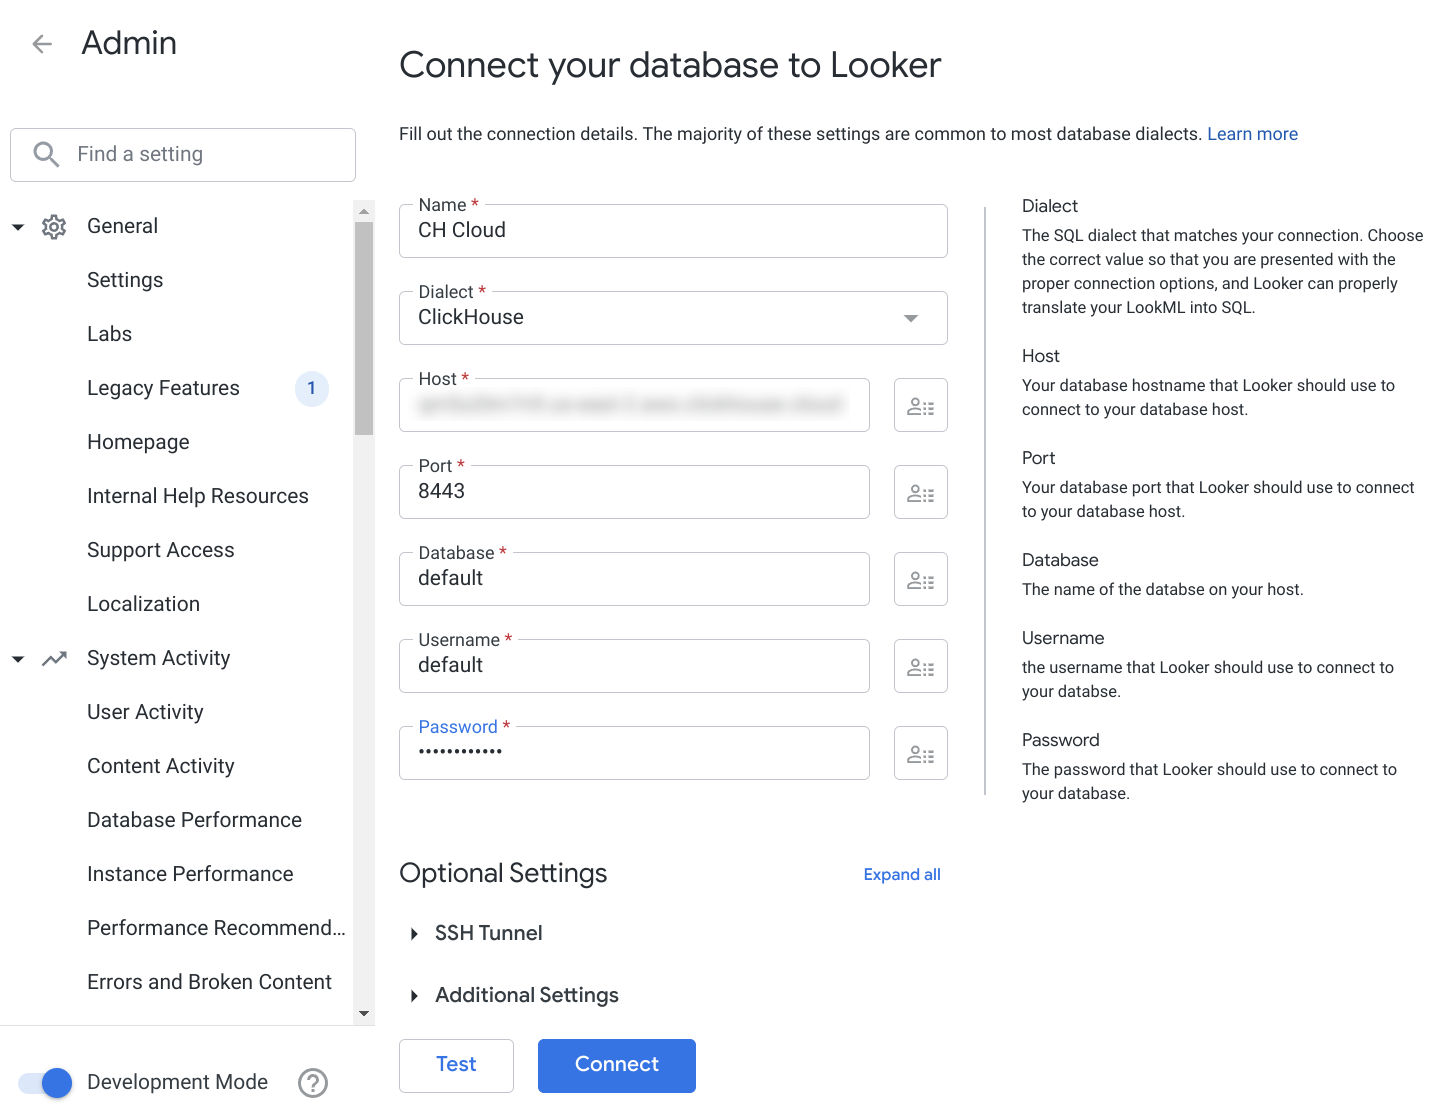
If you are using ClickHouse Cloud or your deployment requires SSL, make sure you have SSL turned on in the additional settings.
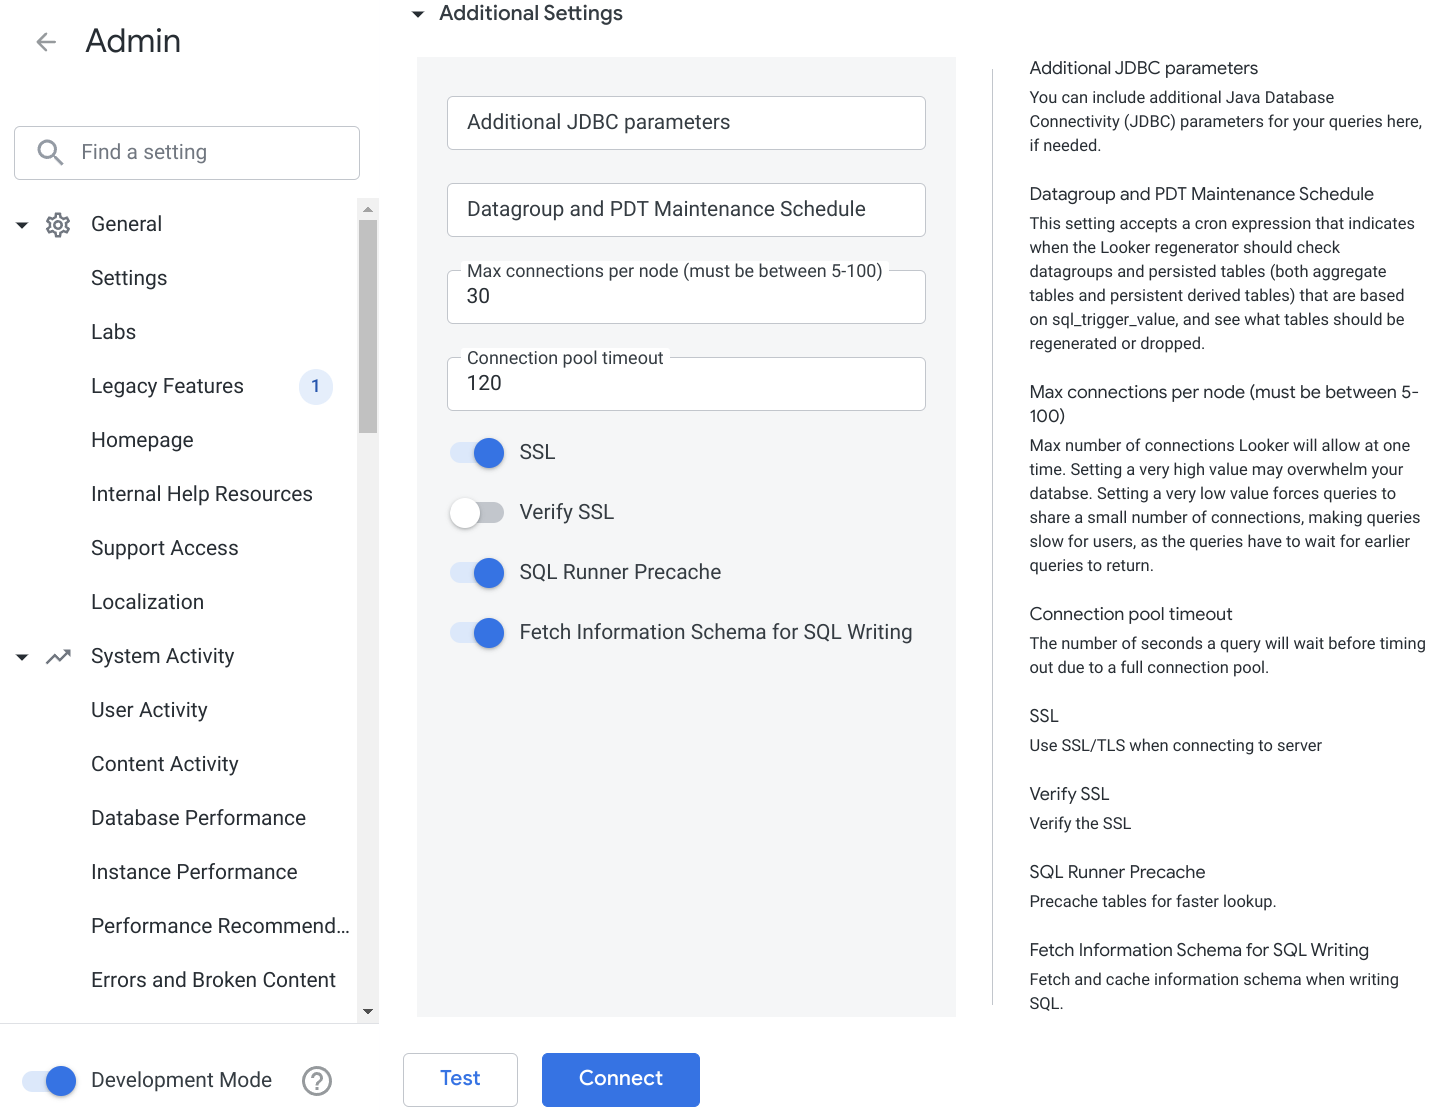
Test your connection first, and, once it is done, connect to your new ClickHouse data source.
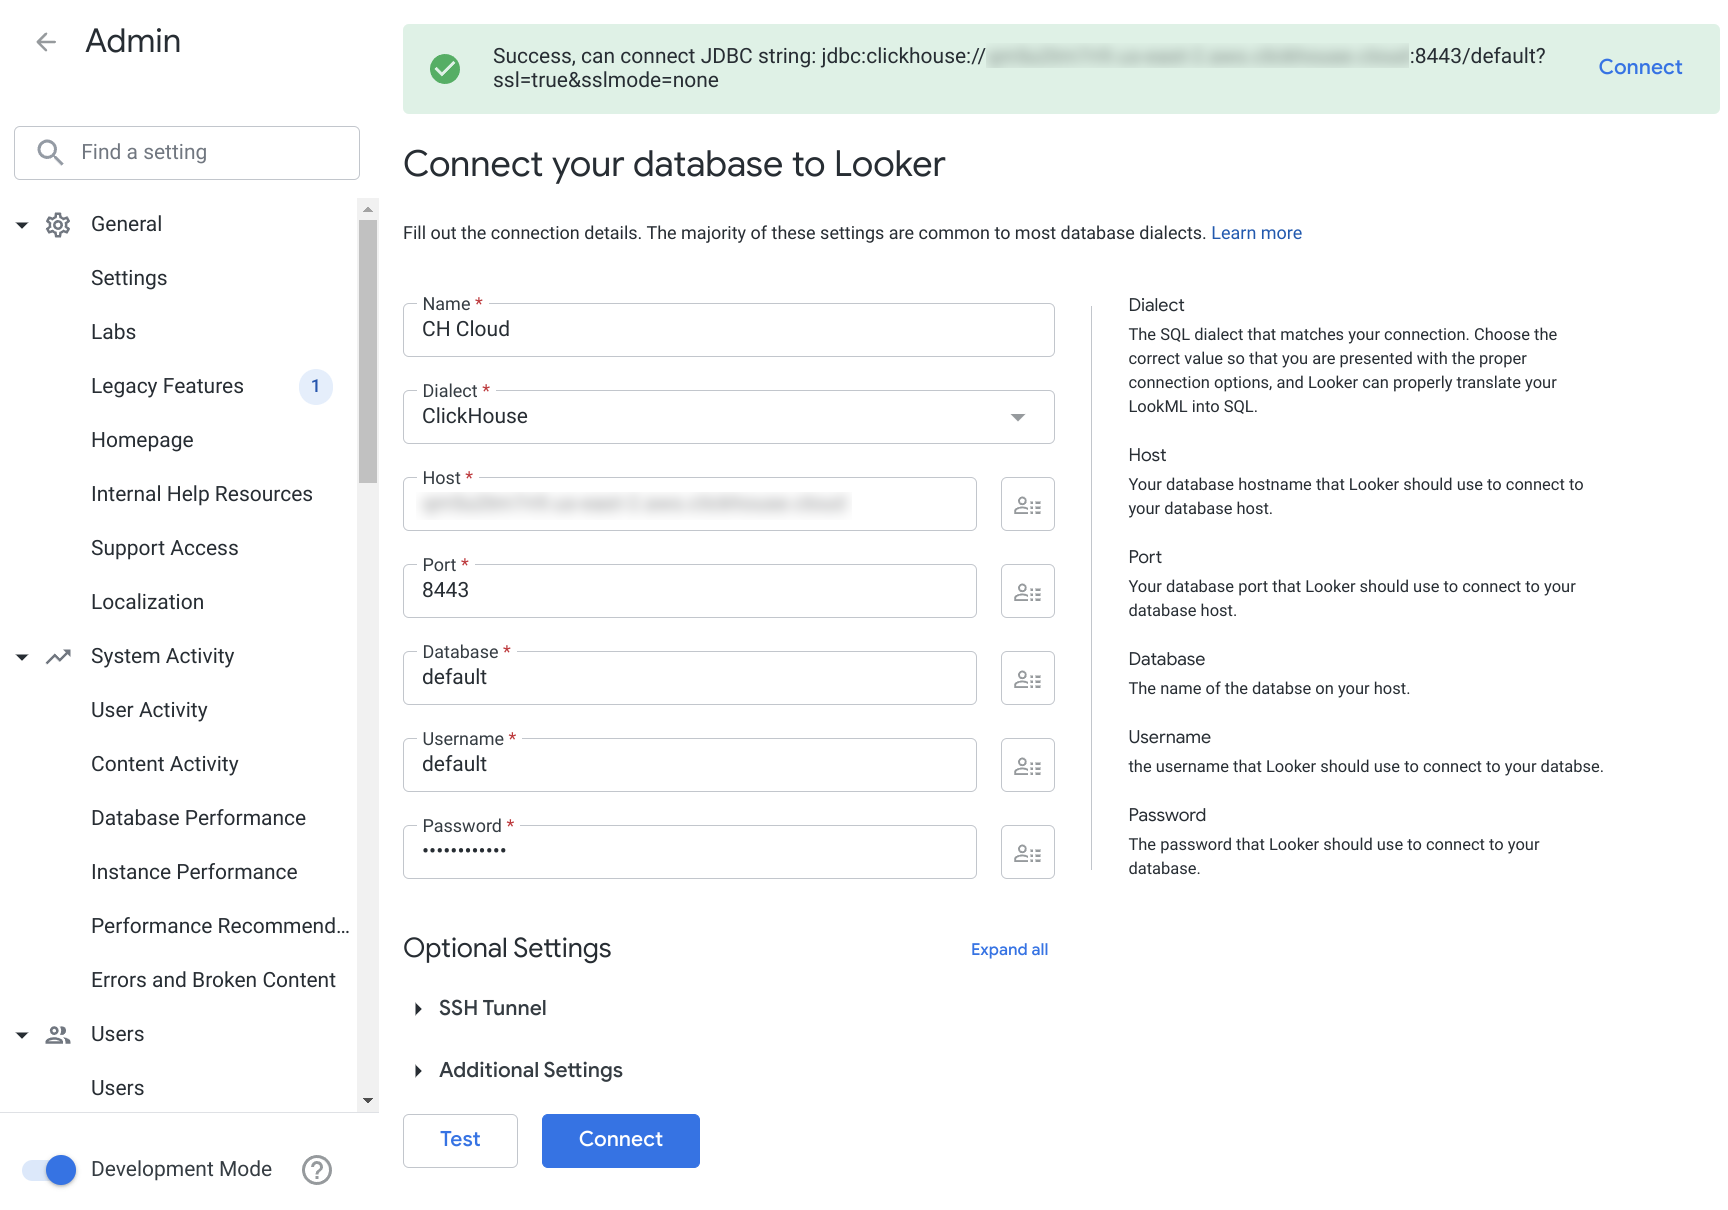
Now you should be able to attach ClickHouse DataSource to your Looker project.
3. Known limitations
- The following data types are handled as strings by default:
- Array - serialization does not work as expected due to the JDBC driver limitations
- Decimal* - can be changed to number in the model
- LowCardinality(...) - can be changed to a proper type in the model
- Enum8, Enum16
- UUID
- Tuple
- Map
- JSON
- Nested
- FixedString
- Geo types
- MultiPolygon
- Polygon
- Point
- Ring
- Symmetric aggregate feature is not supported
- Full outer join is not yet implemented in the driver

