Integrate Google Cloud Storage with ClickHouse
If you are using ClickHouse Cloud on Google Cloud, this page does not apply as your services will already be using Google Cloud Storage. If you are looking to SELECT or INSERT data from GCS, please see the gcs table function.
ClickHouse recognizes that GCS represents an attractive storage solution for users seeking to separate storage and compute. To help achieve this, support is provided for using GCS as the storage for a MergeTree engine. This will enable users to exploit the scalability and cost benefits of GCS, and the insert and query performance of the MergeTree engine.
GCS Backed MergeTree
Creating a Disk
To utilize a GCS bucket as a disk, we must first declare it within the ClickHouse configuration in a file under conf.d. An example of a GCS disk declaration is shown below. This configuration includes multiple sections to configure the GCS "disk", the cache, and the policy that is specified in DDL queries when tables are to be created on the GCS disk. Each of these are described below.
storage_configuration > disks > gcs
This part of the configuration is shown in the highlighted section and specifies that:
- Batch deletes are not to be performed. GCS does not currently support batch deletes, so the autodetect is disabled to suppress error messages.
- The type of the disk is
s3because the S3 API is in use. - The endpoint as provided by GCS
- The service account HMAC key and secret
- The metadata path on the local disk
<clickhouse>
    <storage_configuration>
        <disks>
            <gcs>
                <support_batch_delete>false</support_batch_delete>
                <type>s3</type>
                <endpoint>https://storage.googleapis.com/BUCKET NAME/FOLDER NAME/</endpoint>
                <access_key_id>SERVICE ACCOUNT HMAC KEY</access_key_id>
                <secret_access_key>SERVICE ACCOUNT HMAC SECRET</secret_access_key>
                <metadata_path>/var/lib/clickhouse/disks/gcs/</metadata_path>
            </gcs>
        </disks>
        <policies>
            <gcs_main>
                <volumes>
                    <main>
                        <disk>gcs</disk>
                    </main>
                </volumes>
            </gcs_main>
        </policies>
    </storage_configuration>
</clickhouse>
storage_configuration > disks > cache
The example configuration highlighted below enables a 10Gi memory cache for the disk gcs.
<clickhouse>
    <storage_configuration>
        <disks>
            <gcs>
                <support_batch_delete>false</support_batch_delete>
                <type>s3</type>
                <endpoint>https://storage.googleapis.com/BUCKET NAME/FOLDER NAME/</endpoint>
                <access_key_id>SERVICE ACCOUNT HMAC KEY</access_key_id>
                <secret_access_key>SERVICE ACCOUNT HMAC SECRET</secret_access_key>
                <metadata_path>/var/lib/clickhouse/disks/gcs/</metadata_path>
            </gcs>
	    <gcs_cache>
                <type>cache</type>
                <disk>gcs</disk>
                <path>/var/lib/clickhouse/disks/gcs_cache/</path>
                <max_size>10Gi</max_size>
            </gcs_cache>
        </disks>
        <policies>
            <gcs_main>
                <volumes>
                    <main>
                        <disk>gcs_cache</disk>
                    </main>
                </volumes>
            </gcs_main>
        </policies>
    </storage_configuration>
</clickhouse>
storage_configuration > policies > gcs_main
Storage configuration policies allow choosing where data is stored. The policy highlighted below allows data to be stored on the disk gcs by specifying the policy gcs_main. For example, CREATE TABLE ... SETTINGS storage_policy='gcs_main'.
<clickhouse>
    <storage_configuration>
        <disks>
            <gcs>
                <support_batch_delete>false</support_batch_delete>
                <type>s3</type>
                <endpoint>https://storage.googleapis.com/BUCKET NAME/FOLDER NAME/</endpoint>
                <access_key_id>SERVICE ACCOUNT HMAC KEY</access_key_id>
                <secret_access_key>SERVICE ACCOUNT HMAC SECRET</secret_access_key>
                <metadata_path>/var/lib/clickhouse/disks/gcs/</metadata_path>
            </gcs>
        </disks>
        <policies>
            <gcs_main>
                <volumes>
                    <main>
                        <disk>gcs</disk>
                    </main>
                </volumes>
            </gcs_main>
        </policies>
    </storage_configuration>
</clickhouse>
A complete list of settings relevant to this disk declaration can be found here.
Creating a table
Assuming you have configured your disk to use a bucket with write access, you should be able to create a table such as in the example below. For purposes of brevity, we use a subset of the NYC taxi columns and stream data directly to the GCS-backed table:
CREATE TABLE trips_gcs
(
   `trip_id` UInt32,
   `pickup_date` Date,
   `pickup_datetime` DateTime,
   `dropoff_datetime` DateTime,
   `pickup_longitude` Float64,
   `pickup_latitude` Float64,
   `dropoff_longitude` Float64,
   `dropoff_latitude` Float64,
   `passenger_count` UInt8,
   `trip_distance` Float64,
   `tip_amount` Float32,
   `total_amount` Float32,
   `payment_type` Enum8('UNK' = 0, 'CSH' = 1, 'CRE' = 2, 'NOC' = 3, 'DIS' = 4)
)
ENGINE = MergeTree
PARTITION BY toYYYYMM(pickup_date)
ORDER BY pickup_datetime
# highlight-next-line
SETTINGS storage_policy='gcs_main'
INSERT INTO trips_gcs SELECT trip_id, pickup_date, pickup_datetime, dropoff_datetime, pickup_longitude, pickup_latitude, dropoff_longitude, dropoff_latitude, passenger_count, trip_distance, tip_amount, total_amount, payment_type FROM s3('https://ch-nyc-taxi.s3.eu-west-3.amazonaws.com/tsv/trips_{0..9}.tsv.gz', 'TabSeparatedWithNames') LIMIT 1000000;
Depending on the hardware, this latter insert of 1m rows may take a few minutes to execute. You can confirm the progress via the system.processes table. Feel free to adjust the row count up to the limit of 10m and explore some sample queries.
SELECT passenger_count, avg(tip_amount) as avg_tip, avg(total_amount) as avg_amount FROM trips_gcs GROUP BY passenger_count;
Handling Replication
Replication with GCS disks can be accomplished by using the ReplicatedMergeTree table engine. See the replicating a single shard across two GCP regions using GCS guide for details.
Learn More
The Cloud Storage XML API is interoperable with some tools and libraries that work with services such as Amazon Simple Storage Service (Amazon S3).
For further information on tuning threads, see Optimizing for Performance.
Using Google Cloud Storage (GCS)
Object storage is used by default in ClickHouse Cloud, you do not need to follow this procedure if you are running in ClickHouse Cloud.
Plan the deployment
This tutorial is written to describe a replicated ClickHouse deployment running in Google Cloud and using Google Cloud Storage (GCS) as the ClickHouse storage disk "type".
In the tutorial, you will deploy ClickHouse server nodes in Google Cloud Engine VMs, each with an associated GCS bucket for storage. Replication is coordinated by a set of ClickHouse Keeper nodes, also deployed as VMs.
Sample requirements for high availability:
- Two ClickHouse server nodes, in two GCP regions
- Two GCS buckets, deployed in the same regions as the two ClickHouse server nodes
- Three ClickHouse Keeper nodes, two of them are deployed in the same regions as the ClickHouse server nodes. The third can be in the same region as one of the first two Keeper nodes, but in a different availability zone.
ClickHouse Keeper requires two nodes to function, hence a requirement for three nodes for high availability.
Prepare VMs
Deploy five VMS in three regions:
| Region | ClickHouse Server | Bucket | ClickHouse Keeper |
|---|---|---|---|
| 1 | chnode1 | bucket_regionname | keepernode1 |
| 2 | chnode2 | bucket_regionname | keepernode2 |
3 * | keepernode3 |
* This can be a different availability zone in the same region as 1 or 2.
Deploy ClickHouse
Deploy ClickHouse on two hosts, in the sample configurations these are named chnode1, chnode2.
Place chnode1 in one GCP region, and chnode2 in a second. In this guide us-east1 and us-east4 are used for the compute engine VMs, and also for GCS buckets.
Do not start clickhouse server until after it is configured. Just install it.
Refer to the installation instructions when performing the deployment steps on the ClickHouse server nodes.
Deploy ClickHouse Keeper
Deploy ClickHouse Keeper on three hosts, in the sample configurations these are named keepernode1, keepernode2, and keepernode3. keepernode1 can be deployed in the same region as chnode1, keepernode2 with chnode2, and keepernode3 in either region, but in a different availability zone from the ClickHouse node in that region.
Refer to the installation instructions when performing the deployment steps on the ClickHouse Keeper nodes.
Create two buckets
The two ClickHouse servers will be located in different regions for high availability. Each will have a GCS bucket in the same region.
In Cloud Storage > Buckets choose CREATE BUCKET. For this tutorial two buckets are created, one in each of us-east1 and us-east4. The buckets are single region, standard storage class, and not public. When prompted, enable public access prevention. Do not create folders, they will be created when ClickHouse writes to the storage.
If you need step-by-step instructions to create buckets and an HMAC key, then expand Create GCS buckets and an HMAC key and follow along:
Create GCS buckets and an HMAC key
ch_bucket_us_east1

ch_bucket_us_east4

Generate an Access key
Create a service account HMAC key and secret
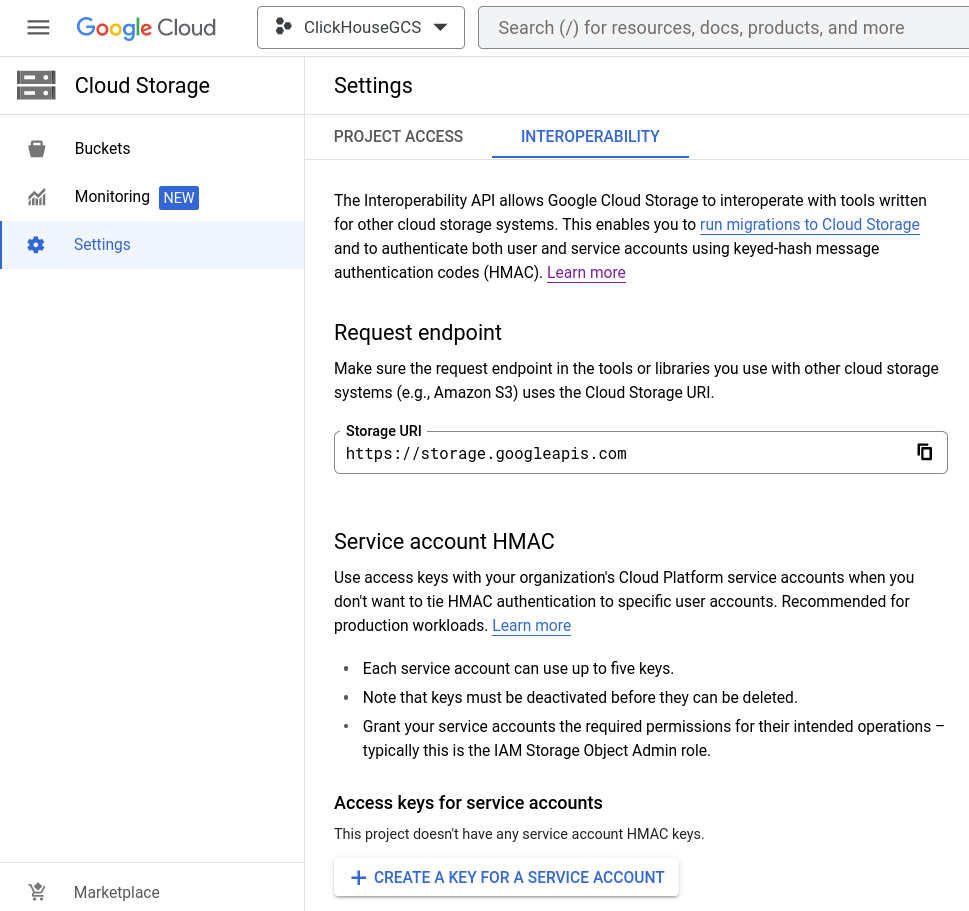
Open Cloud Storage > Settings > Interoperability and either choose an existing Access key, or CREATE A KEY FOR A SERVICE ACCOUNT. This guide covers the path for creating a new key for a new service account.
Add a new service account
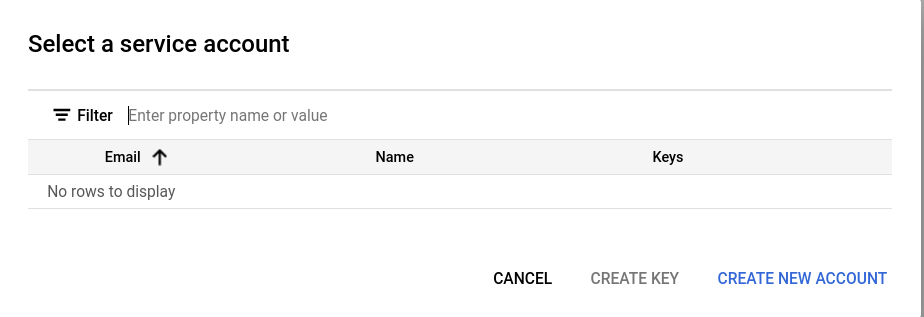
If this is a project with no existing service account, CREATE NEW ACCOUNT.
There are three steps to creating the service account, in the first step give the account a meaningful name, ID, and description.
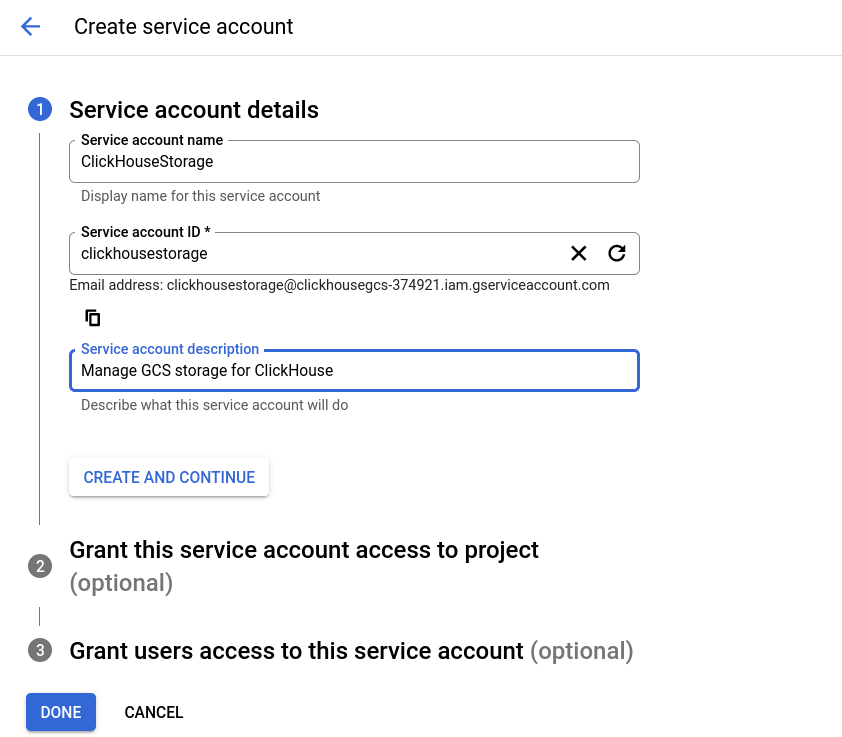
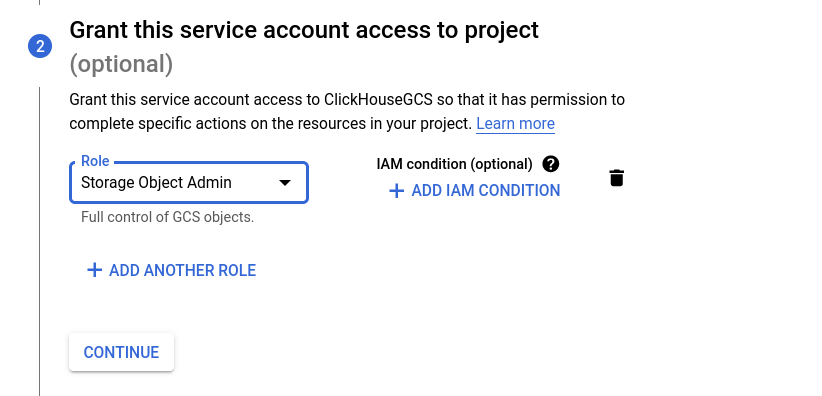
In the Interoperability settings dialog the IAM role Storage Object Admin role is recommended; select that role in step two.
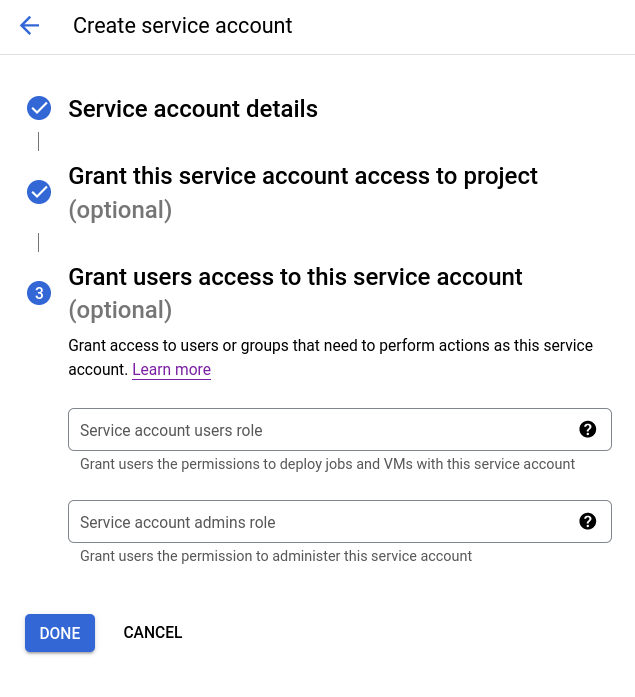
Step three is optional and not used in this guide. You may allow users to have these privileges based on your policies.
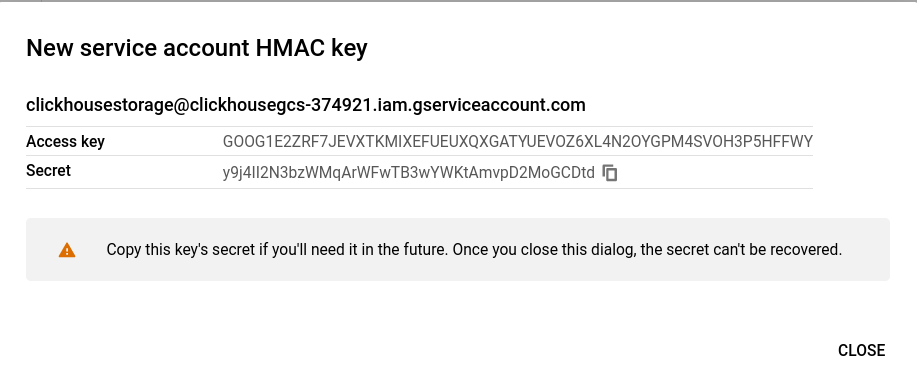
The service account HMAC key will be displayed. Save this information, as it will be used in the ClickHouse configuration.
Configure ClickHouse Keeper
All of the ClickHouse Keeper nodes have the same configuration file except for the server_id line (first highlighted line below). Modify the file with the hostnames for your ClickHouse Keeper servers, and on each of the servers set the server_id to match the appropriate server entry in the raft_configuration. Since this example has server_id set to 3, we have highlighted the matching lines in the raft_configuration.
- Edit the file with your hostnames, and make sure that they resolve from the ClickHouse server nodes and the Keeper nodes
- Copy the file into place (
/etc/clickhouse-keeper/keeper_config.xmlon each of the Keeper servers - Edit the
server_idon each machine, based on its entry number in theraft_configuration
<clickhouse>
    <logger>
        <level>trace</level>
        <log>/var/log/clickhouse-keeper/clickhouse-keeper.log</log>
        <errorlog>/var/log/clickhouse-keeper/clickhouse-keeper.err.log</errorlog>
        <size>1000M</size>
        <count>3</count>
    </logger>
    <listen_host>0.0.0.0</listen_host>
    <keeper_server>
        <tcp_port>9181</tcp_port>
        <server_id>3</server_id>
        <log_storage_path>/var/lib/clickhouse/coordination/log</log_storage_path>
        <snapshot_storage_path>/var/lib/clickhouse/coordination/snapshots</snapshot_storage_path>

        <coordination_settings>
            <operation_timeout_ms>10000</operation_timeout_ms>
            <session_timeout_ms>30000</session_timeout_ms>
            <raft_logs_level>warning</raft_logs_level>
        </coordination_settings>

        <raft_configuration>
            <server>
                <id>1</id>
                <hostname>keepernode1.us-east1-b.c.clickhousegcs-374921.internal</hostname>
                <port>9234</port>
            </server>
            <server>
                <id>2</id>
                <hostname>keepernode2.us-east4-c.c.clickhousegcs-374921.internal</hostname>
                <port>9234</port>
            </server>
            <server>
                <id>3</id>
                <hostname>keepernode3.us-east5-a.c.clickhousegcs-374921.internal</hostname>
                <port>9234</port>
            </server>
        </raft_configuration>
    </keeper_server>
</clickhouse>
Configure ClickHouse Server
Some of the steps in this guide will ask you to place a configuration file in /etc/clickhouse-server/config.d/. This is the default location on Linux systems for configuration override files. When you put these files into that directory ClickHouse will merge the content with the default configuration. By placing these files in the config.d directory you will avoid losing your configuration during an upgrade.
Networking
By default, ClickHouse listens on the loopback interface, in a replicated setup networking between machines is necessary. Listen on all interfaces:
<clickhouse>
    <listen_host>0.0.0.0</listen_host>
</clickhouse>
Remote ClickHouse Keeper servers
Replication is coordinated by ClickHouse Keeper. This configuration file identifies the ClickHouse Keeper nodes by hostname and port number.
- Edit the hostnames to match your Keeper hosts
<clickhouse>
    <zookeeper>
        <node index="1">
            <host>keepernode1.us-east1-b.c.clickhousegcs-374921.internal</host>
            <port>9181</port>
        </node>
        <node index="2">
            <host>keepernode2.us-east4-c.c.clickhousegcs-374921.internal</host>
            <port>9181</port>
        </node>
        <node index="3">
            <host>keepernode3.us-east5-a.c.clickhousegcs-374921.internal</host>
            <port>9181</port>
        </node>
    </zookeeper>
</clickhouse>
Remote ClickHouse servers
This file configures the hostname and port of each ClickHouse server in the cluster. The default configuration file contains sample cluster definitions, in order to show only the clusters that are completely configured the tag replace="true" is added to the remote_servers entry so that when this configuration is merged with the default it replaces the remote_servers section instead of adding to it.
- Edit the file with your hostnames, and make sure that they resolve from the ClickHouse server nodes
<clickhouse>
    <remote_servers replace="true">
        <cluster_1S_2R>
            <shard>
                <replica>
                    <host>chnode1.us-east1-b.c.clickhousegcs-374921.internal</host>
                    <port>9000</port>
                </replica>
                <replica>
                    <host>chnode2.us-east4-c.c.clickhousegcs-374921.internal</host>
                    <port>9000</port>
                </replica>
            </shard>
        </cluster_1S_2R>
    </remote_servers>
</clickhouse>
Replica identification
This file configures settings related to the ClickHouse Keeper path. Specifically the macros used to identify which replica the data is part of. On one server the replica should be specified as replica_1, and on the other server replica_2. The names can be changed, based on our example of one replica being stored in South Carolina and the other in Northern Virginia the values could be carolina and virginia; just make sure that they are different on each machine.
<clickhouse>
    <distributed_ddl>
            <path>/clickhouse/task_queue/ddl</path>
    </distributed_ddl>
    <macros>
        <cluster>cluster_1S_2R</cluster>
        <shard>1</shard>
        <replica>replica_1</replica>
    </macros>
</clickhouse>
Storage in GCS
ClickHouse storage configuration includes disks and policies. The disk being configured below is named gcs, and is of type s3. The type is s3 because ClickHouse accesses the GCS bucket as if it was an AWS S3 bucket. Two copies of this configuration will be needed, one for each of the ClickHouse server nodes.
These substitutions should be made in the configuration below.
These substitutions differ between the two ClickHouse server nodes:
REPLICA 1 BUCKETshould be set to the name of the bucket in the same region as the serverREPLICA 1 FOLDERshould be changed toreplica_1on one of the servers, andreplica_2on the other
These substitutions are common across the two nodes:
- The
access_key_idshould be set to the HMAC Key generated earlier - The
secret_access_keyshould be set to HMAC Secret generated earlier
<clickhouse>
    <storage_configuration>
        <disks>
            <gcs>
                <support_batch_delete>false</support_batch_delete>
                <type>s3</type>
                <endpoint>https://storage.googleapis.com/REPLICA 1 BUCKET/REPLICA 1 FOLDER/</endpoint>
                <access_key_id>SERVICE ACCOUNT HMAC KEY</access_key_id>
                <secret_access_key>SERVICE ACCOUNT HMAC SECRET</secret_access_key>
                <metadata_path>/var/lib/clickhouse/disks/gcs/</metadata_path>
            </gcs>
	    <cache>
                <type>cache</type>
                <disk>gcs</disk>
                <path>/var/lib/clickhouse/disks/gcs_cache/</path>
                <max_size>10Gi</max_size>
            </cache>
        </disks>
        <policies>
            <gcs_main>
                <volumes>
                    <main>
                        <disk>gcs</disk>
                    </main>
                </volumes>
            </gcs_main>
        </policies>
    </storage_configuration>
</clickhouse>
Start ClickHouse Keeper
Use the commands for your operating system, for example:
sudo systemctl enable clickhouse-keeper
sudo systemctl start clickhouse-keeper
sudo systemctl status clickhouse-keeper
Check ClickHouse Keeper status
Send commands to the ClickHouse Keeper with netcat. For example, mntr returns the state of the ClickHouse Keeper cluster. If you run the command on each of the Keeper nodes you will see that one is a leader, and the other two are followers:
echo mntr | nc localhost 9181
zk_version	v22.7.2.15-stable-f843089624e8dd3ff7927b8a125cf3a7a769c069
zk_avg_latency	0
zk_max_latency	11
zk_min_latency	0
zk_packets_received	1783
zk_packets_sent	1783
zk_num_alive_connections	2
zk_outstanding_requests	0
zk_server_state	leader
zk_znode_count	135
zk_watch_count	8
zk_ephemerals_count	3
zk_approximate_data_size	42533
zk_key_arena_size	28672
zk_latest_snapshot_size	0
zk_open_file_descriptor_count	182
zk_max_file_descriptor_count	18446744073709551615
zk_followers	2
zk_synced_followers	2
Start ClickHouse server
On chnode1 and chnode run:
sudo service clickhouse-server start
sudo service clickhouse-server status
Verification
Verify disk configuration
system.disks should contain records for each disk:
- default
- gcs
- cache
SELECT *
FROM system.disks
FORMAT Vertical
Row 1:
──────
name:             cache
path:             /var/lib/clickhouse/disks/gcs/
free_space:       18446744073709551615
total_space:      18446744073709551615
unreserved_space: 18446744073709551615
keep_free_space:  0
type:             s3
is_encrypted:     0
is_read_only:     0
is_write_once:    0
is_remote:        1
is_broken:        0
cache_path:       /var/lib/clickhouse/disks/gcs_cache/

Row 2:
──────
name:             default
path:             /var/lib/clickhouse/
free_space:       6555529216
total_space:      10331889664
unreserved_space: 6555529216
keep_free_space:  0
type:             local
is_encrypted:     0
is_read_only:     0
is_write_once:    0
is_remote:        0
is_broken:        0
cache_path:

Row 3:
──────
name:             gcs
path:             /var/lib/clickhouse/disks/gcs/
free_space:       18446744073709551615
total_space:      18446744073709551615
unreserved_space: 18446744073709551615
keep_free_space:  0
type:             s3
is_encrypted:     0
is_read_only:     0
is_write_once:    0
is_remote:        1
is_broken:        0
cache_path:

3 rows in set. Elapsed: 0.002 sec.
Verify that tables created on the cluster are created on both nodes
# highlight-next-line
create table trips on cluster 'cluster_1S_2R' (
 `trip_id` UInt32,
 `pickup_date` Date,
 `pickup_datetime` DateTime,
 `dropoff_datetime` DateTime,
 `pickup_longitude` Float64,
 `pickup_latitude` Float64,
 `dropoff_longitude` Float64,
 `dropoff_latitude` Float64,
 `passenger_count` UInt8,
 `trip_distance` Float64,
 `tip_amount` Float32,
 `total_amount` Float32,
 `payment_type` Enum8('UNK' = 0, 'CSH' = 1, 'CRE' = 2, 'NOC' = 3, 'DIS' = 4))
ENGINE = ReplicatedMergeTree
PARTITION BY toYYYYMM(pickup_date)
ORDER BY pickup_datetime
# highlight-next-line
SETTINGS storage_policy='gcs_main'
┌─host───────────────────────────────────────┬─port─┬─status─┬─error─┬─num_hosts_remaining─┬─num_hosts_active─┐
│ chnode2.us-east4-c.c.gcsqa-375100.internal │ 9000 │      0 │       │                   1 │                1 │
└────────────────────────────────────────────┴──────┴────────┴───────┴─────────────────────┴──────────────────┘
┌─host───────────────────────────────────────┬─port─┬─status─┬─error─┬─num_hosts_remaining─┬─num_hosts_active─┐
│ chnode1.us-east1-b.c.gcsqa-375100.internal │ 9000 │      0 │       │                   0 │                0 │
└────────────────────────────────────────────┴──────┴────────┴───────┴─────────────────────┴──────────────────┘

2 rows in set. Elapsed: 0.641 sec.
Verify that data can be inserted
INSERT INTO trips SELECT
    trip_id,
    pickup_date,
    pickup_datetime,
    dropoff_datetime,
    pickup_longitude,
    pickup_latitude,
    dropoff_longitude,
    dropoff_latitude,
    passenger_count,
    trip_distance,
    tip_amount,
    total_amount,
    payment_type
FROM s3('https://ch-nyc-taxi.s3.eu-west-3.amazonaws.com/tsv/trips_{0..9}.tsv.gz', 'TabSeparatedWithNames')
LIMIT 1000000
Verify that the storage policy gcs_main is used for the table.
SELECT
    engine,
    data_paths,
    metadata_path,
    storage_policy,
    formatReadableSize(total_bytes)
FROM system.tables
WHERE name = 'trips'
FORMAT Vertical
Row 1:
──────
engine:                          ReplicatedMergeTree
data_paths:                      ['/var/lib/clickhouse/disks/gcs/store/631/6315b109-d639-4214-a1e7-afbd98f39727/']
metadata_path:                   /var/lib/clickhouse/store/e0f/e0f3e248-7996-44d4-853e-0384e153b740/trips.sql
storage_policy:                  gcs_main
formatReadableSize(total_bytes): 36.42 MiB

1 row in set. Elapsed: 0.002 sec.
Verify in Google Cloud Console
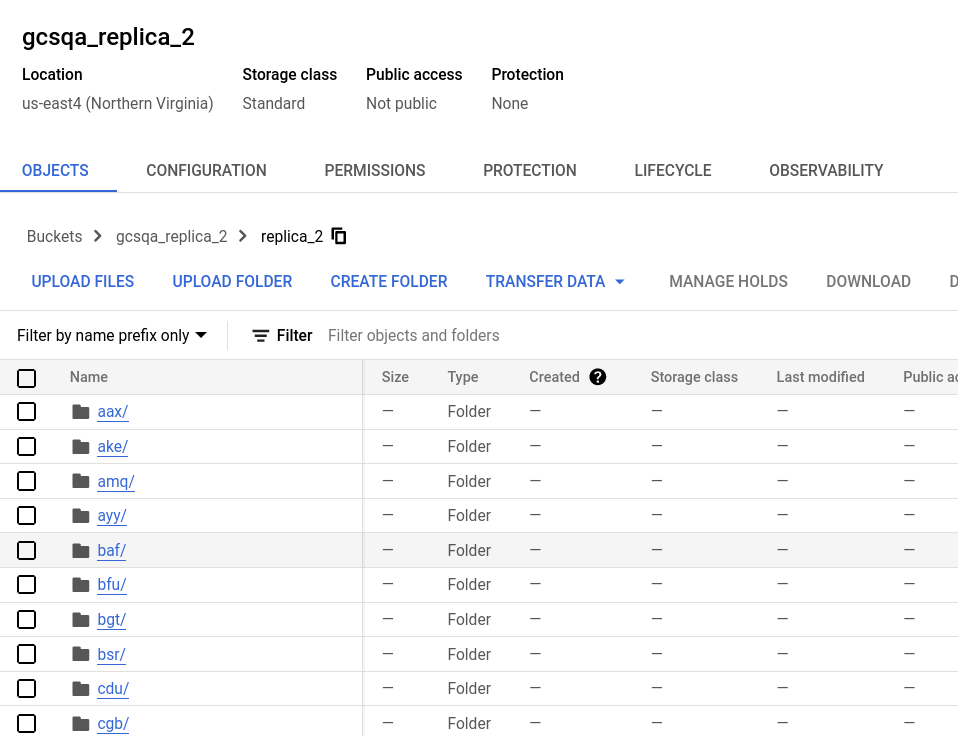
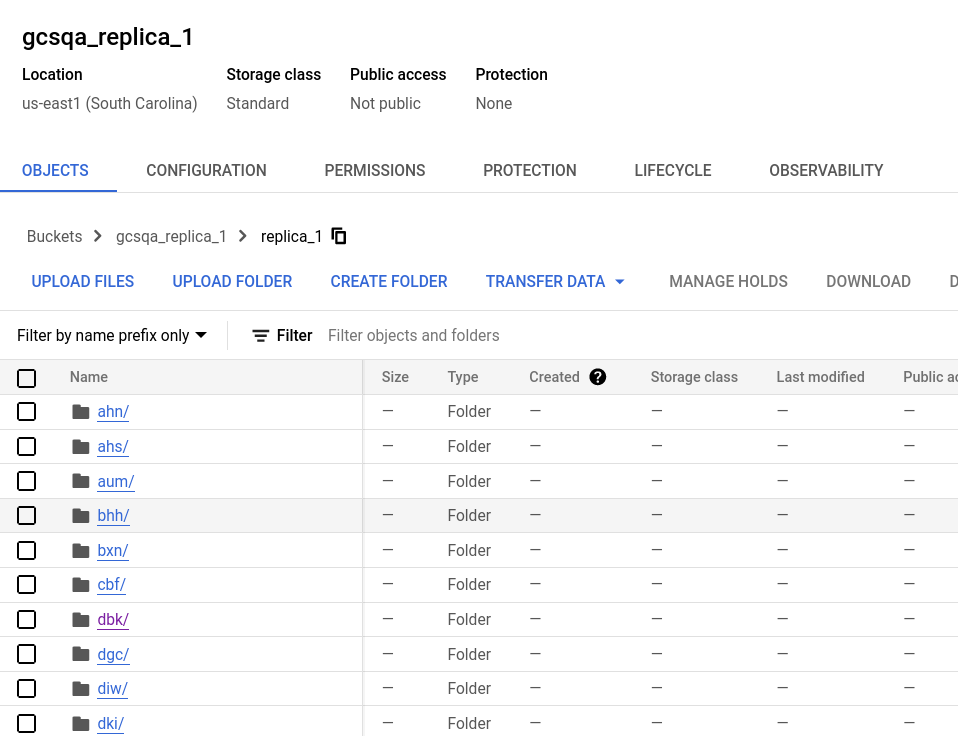
Looking at the buckets you will see that a folder was created in each bucket with the name that was used in the storage.xml configuration file. Expand the folders and you will see many files, representing the data partitions.
Bucket for replica one
Bucket for replica two
