Separation of Storage and Compute
Overview
This guide explores how you can use ClickHouse and S3 to implement an architecture with separated storage and compute.
Separation of storage and compute means that computing resources and storage resources are managed independently. In ClickHouse, this allows for better scalability, cost-efficiency, and flexibility. You can scale storage and compute resources separately as needed, optimizing performance and costs.
Using ClickHouse backed by S3 is especially useful for use cases where query performance on "cold" data is less critical. ClickHouse provides support for using S3 as the storage for the MergeTree engine using S3BackedMergeTree. This table engine enables users to exploit the scalability and cost benefits of S3 while maintaining the insert and query performance of the MergeTree engine.
Please note that implementing and managing a separation of storage and compute architecture is more complicated compared to standard ClickHouse deployments. While self-managed ClickHouse allows for separation of storage and compute as discussed in this guide, we recommend using ClickHouse Cloud, which allows you to use ClickHouse in this architecture without configuration using the SharedMergeTree table engine.
This guide assumes you are using ClickHouse version 22.8 or higher.
Do not configure any AWS/GCS life cycle policy. This is not supported and could lead to broken tables.
1. Use S3 as a ClickHouse disk
Creating a disk
Create a new file in the ClickHouse config.d directory to store the storage configuration:
vim /etc/clickhouse-server/config.d/storage_config.xml
Copy the following XML in to the newly created file, replacing BUCKET, ACCESS_KEY_ID, SECRET_ACCESS_KEY with the AWS bucket details where you'd like to store your data:
<clickhouse>
  <storage_configuration>
    <disks>
      <s3_disk>
        <type>s3</type>
        <endpoint>$BUCKET</endpoint>
        <access_key_id>$ACCESS_KEY_ID</access_key_id>
        <secret_access_key>$SECRET_ACCESS_KEY</secret_access_key>
        <metadata_path>/var/lib/clickhouse/disks/s3_disk/</metadata_path>
      </s3_disk>
      <s3_cache>
        <type>cache</type>
        <disk>s3_disk</disk>
        <path>/var/lib/clickhouse/disks/s3_cache/</path>
        <max_size>10Gi</max_size>
      </s3_cache>
    </disks>
    <policies>
      <s3_main>
        <volumes>
          <main>
            <disk>s3_disk</disk>
          </main>
        </volumes>
      </s3_main>
    </policies>
  </storage_configuration>
</clickhouse>
If you need to further specify settings for the S3 disk, for example to specify a region or send a custom HTTP header, you can find the list of relevant settings here.
You can also replace access_key_id and secret_access_key with the following, which will attempt to obtain credentials from environment variables and Amazon EC2 metadata:
<use_environment_credentials>true</use_environment_credentials>
After you've created your configuration file, you need to update the owner of the file to the clickhouse user and group:
chown clickhouse:clickhouse /etc/clickhouse-server/config.d/storage_config.xml
You can now restart the ClickHouse server to have the changes take effect:
service clickhouse-server restart
2. Create a table backed by S3
To test that we've configured the S3 disk properly, we can attempt to create and query a table.
Create a table specifying the new S3 storage policy:
CREATE TABLE my_s3_table
  (
    `id` UInt64,
    `column1` String
  )
ENGINE = MergeTree
ORDER BY id
SETTINGS storage_policy = 's3_main';
Note that we did not have to specify the engine as S3BackedMergeTree. ClickHouse automatically converts the engine type internally if it detects the table is using S3 for storage.
Show that the table was created with the correct policy:
SHOW CREATE TABLE my_s3_table;
You should see the following result:
┌─statement────────────────────────────────────────────────────
│ CREATE TABLE default.my_s3_table
(
  `id` UInt64,
  `column1` String
)
ENGINE = MergeTree
ORDER BY id
SETTINGS storage_policy = 's3_main', index_granularity = 8192
└──────────────────────────────────────────────────────────────
Let's now insert some rows into our new table:
INSERT INTO my_s3_table (id, column1)
  VALUES (1, 'abc'), (2, 'xyz');
Let's verify that our rows were inserted:
SELECT * FROM my_s3_table;
┌─id─┬─column1─┐
│  1 │ abc     │
│  2 │ xyz     │
└────┴─────────┘

2 rows in set. Elapsed: 0.284 sec.
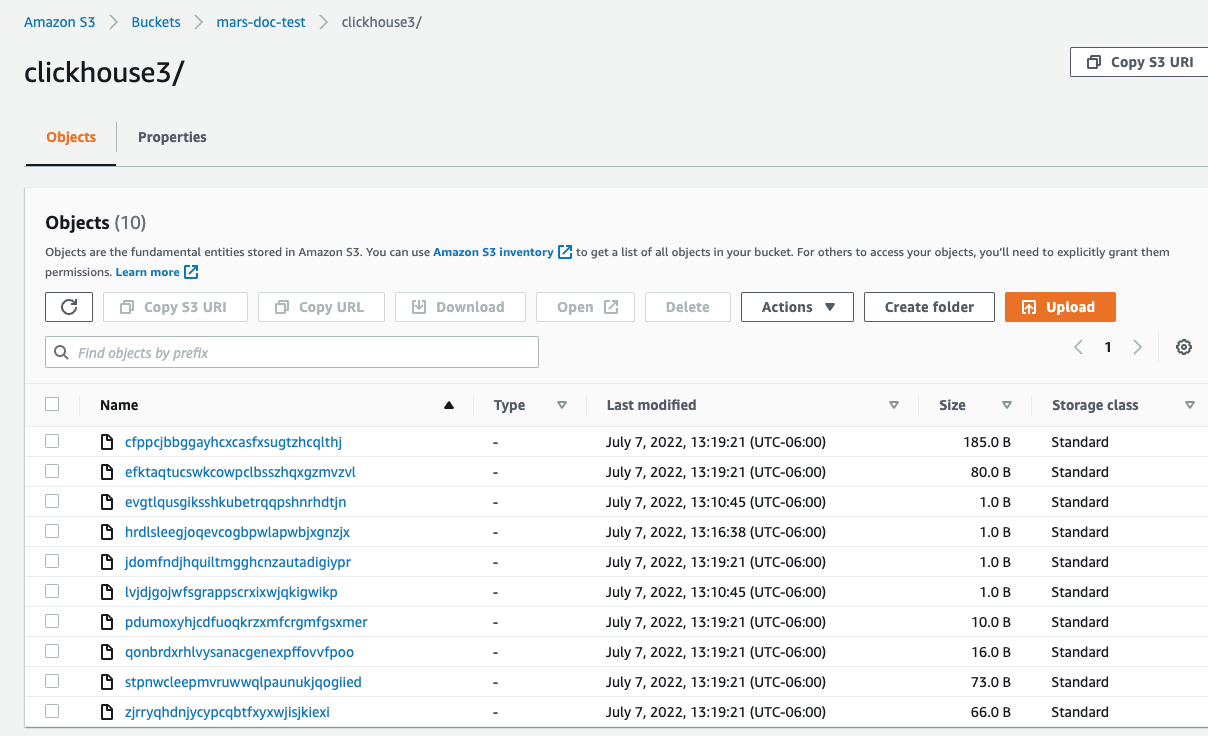
In the AWS console, if your data was successfully inserted to S3, you should see that ClickHouse has created new files in your specified bucket.
If everything worked successfully, you are now using ClickHouse with separated storage and compute!

3. Implementing replication for fault tolerance (optional)
Do not configure any AWS/GCS life cycle policy. This is not supported and could lead to broken tables.
For fault tolerance, you can use multiple ClickHouse server nodes distributed across multiple AWS regions, with an S3 bucket for each node.
Replication with S3 disks can be accomplished by using the ReplicatedMergeTree table engine. See the following guide for details:

